How to Draw Eyes Step by Step
Drawing big sparkly eyes is one of the most satisfying things you can learn. Let's build a pair of adorable shining eyes step by step. Each card below shows exactly what your page should look like at that step. New lines are dark, earlier lines fade back, guides are orange.
We'll start with two light oval guides to get the size and spacing right, then build the thick upper lash lines, the big round irises with their shiny highlights, and finish with eyebrows, soft shading, and rosy blush.
✎ lesson by Lino Ti · construction method, checked step by step · updated July 2026
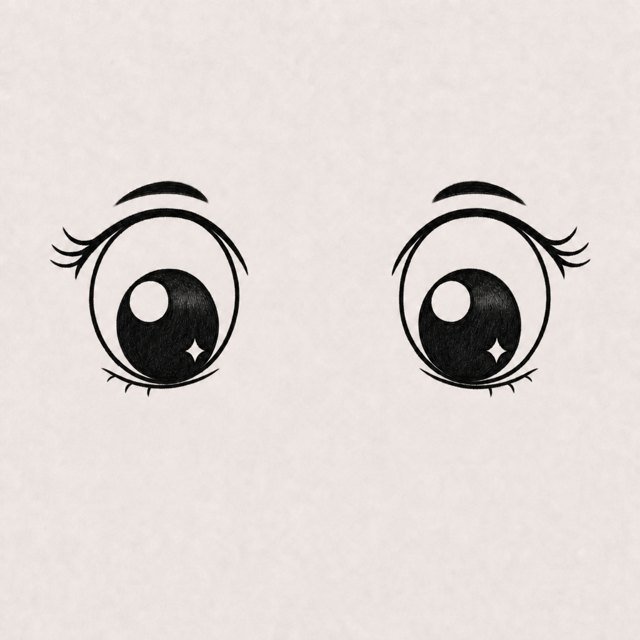
the finished eyes ✎
Draw along with the video
grab a pencil and press play — every step is narrated ✎
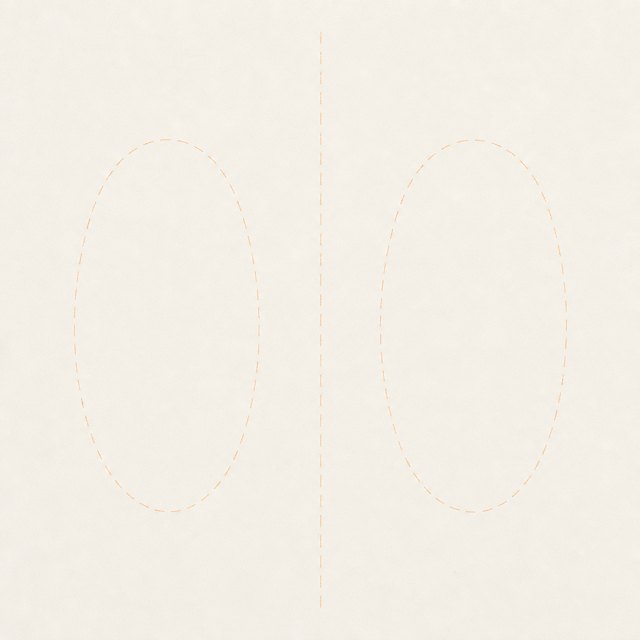
Oval Guides
Sketch two light tall oval guides side by side, with a light vertical center line between them for even spacing.
Begin by lightly sketching two tall oval shapes side by side, one for each eye. Draw a light vertical line between them to keep the spacing even, and make sure both ovals sit on the same level so the eyes look straight ahead. Keep your pencil pressure very light, because these guides will disappear later.
check: both ovals are the same size and sit perfectly level before moving on ✎
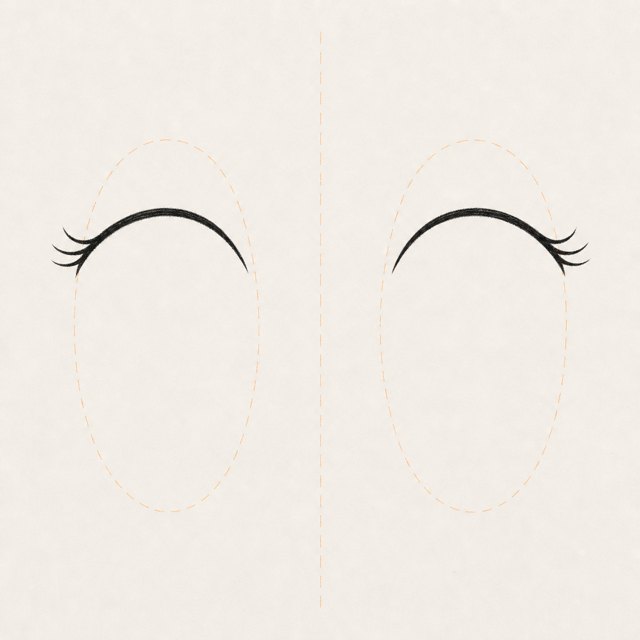
Thick Lash Lines
Draw a thick sweeping upper lash line along the top of each oval, then add three tiny curved lashes at each outer corner.
Now draw the upper lash line on each eye. It is a thick, smooth curve that sweeps along the top of the oval, a little heavier than a normal line. At the outer corner of each eye, add three tiny curved lashes that flick outward. Make both lash lines match so the eyes stay twins.
check: Make sure both lash lines curve the same way and the lashes flick outward, not inward ✎
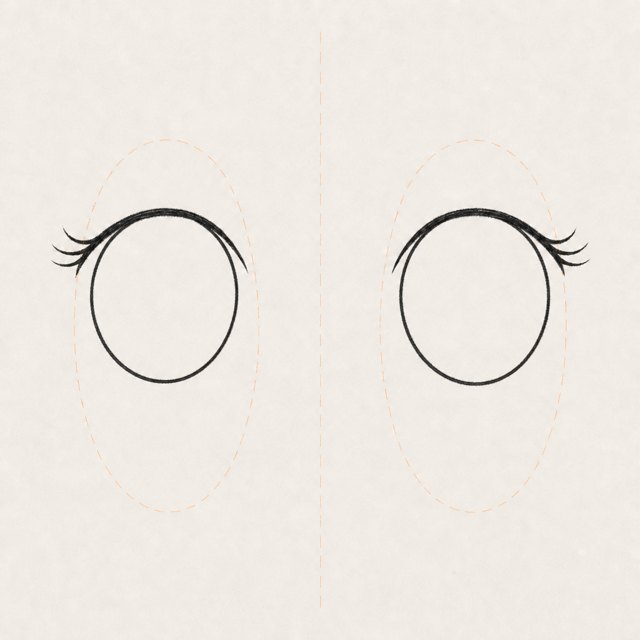
Big Round Irises
Draw a big round iris inside each oval, filling most of the eye and touching the upper lash line.
Inside each oval, draw a big round circle for the iris. It should fill most of the eye and gently tuck up under the thick lash line, which is what makes the eyes look big and sweet. Keep both irises the same size and in the same position so the eyes look in the same direction.
check: both irises are equal in size and tucked under the lash line the same amount ✎
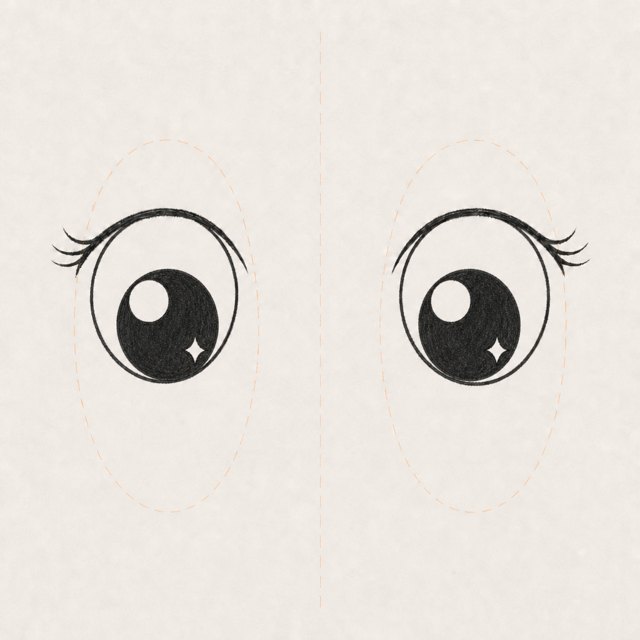
Pupils and Sparkles
Draw a large dark pupil in each iris, one big round highlight circle at the upper left, and one small sparkle star at the lower right. Leave both highlights pure white.
Inside each iris, draw a large dark pupil. Then add the magic: one big round highlight circle at the upper left of each iris, and one tiny four point sparkle star at the lower right. Leave the highlights completely white, with no pencil inside them at all. Those white shapes are what make the eyes shine.
check: Make sure the highlights stay pure white and sit in the same spot in both eyes ✎
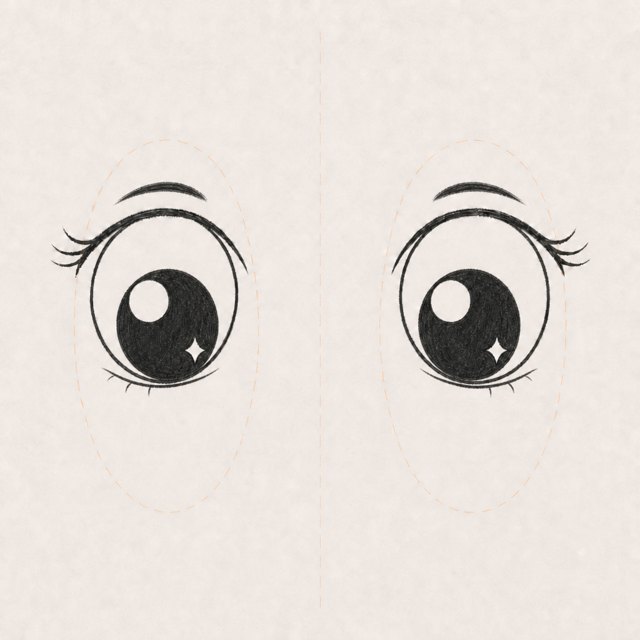
Lids and Eyebrows
Draw a thin lower lid line under each eye with three tiny lash ticks, and a short soft curved eyebrow floating above each eye.
Under each eye, draw a thin, gentle lower lid line, and add three tiny lash ticks along it. Then float a short, soft curved eyebrow above each eye, following the same curve as the lash line. Keep the eyebrows light and smooth so the face stays calm and friendly.
check: the eyebrows match each other and float the same distance above each eye ✎
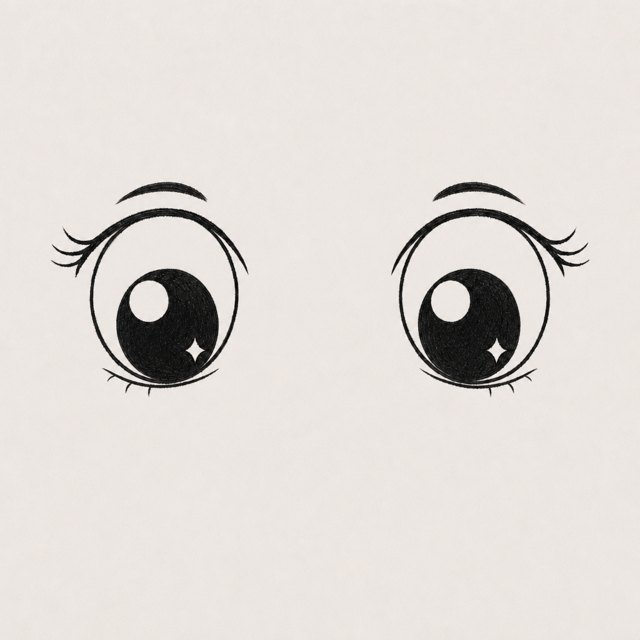
Shading and Shine
Shade the top of each iris under the lash line, darken the pupils, add a soft blush scribble under each eye, then press harder to darken all the final lines.
Finish by shading the top of each iris softly under the lash line, so the eyes look round and glossy, and darken the pupils fully around the white highlights. Add a light scribble of blush under each eye for extra cuteness. Then go over the whole drawing, pressing harder to darken your final lines while the early guides disappear.
check: Make sure the highlights are still pure white and every guide line is gone ✎
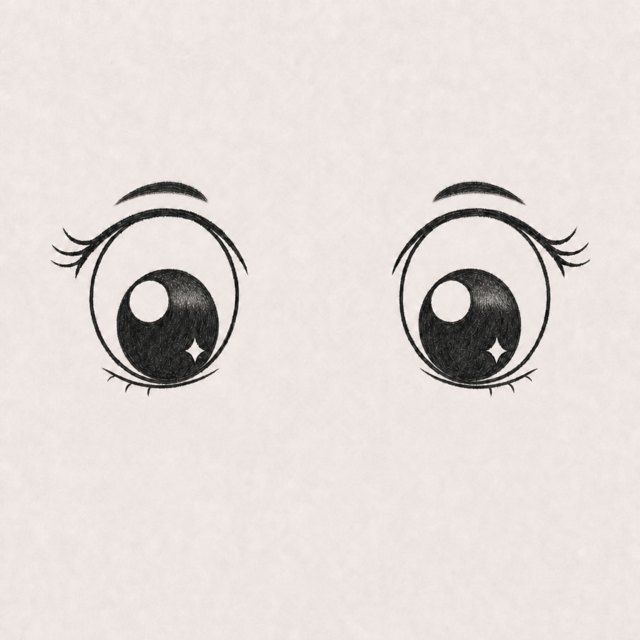
Add Tone and Shade
Pick where the light comes from, then shade the opposite side with light strokes.
Time to learn tone. Artists call the grays between white and black values, and even three are enough: light, medium and dark. Decide where your light comes from, and imagine it shining from the top left. Now shade the opposite side with the side of your pencil, in soft even layers. Shading is what makes your drawing feel round instead of flat.
check: the shading sits on the side away from the light ✎
Finishing Touches
Darken the boldest edges, fill the darkest details, and add a few texture strokes.
The last minute is where the magic happens. Press harder on the outer contour so it stands out, and keep the inside lines thin and soft. Fill your darkest little details completely, add a few short strokes for texture, and give the drawing a soft shadow to sit on. Mixing thin, soft and hard lines is what gives a drawing its character.
check: your outer lines look bolder than your inner ones ✎
Want to draw YOUR eyes?
Upload a photo and your teacher builds this exact kind of lesson from it. You draw it yourself, on paper, guided stroke by stroke.
Turn a photo into your lessonfirst lesson free · no card, no subscription