How to Draw a Cat Step by Step
Welcome to your first cat drawing lesson. Let's break it down into simple steps using basic shapes. Each card below shows exactly what your page should look like at that step. New lines are dark, earlier lines fade back, guides are orange.
We'll start by sketching a circle for the cat's head and an oval for its body, connected by lines for the limbs. This classic construction method helps us build a solid foundation before adding details.
✎ lesson by Lino Ti · construction method, checked step by step · updated July 2026
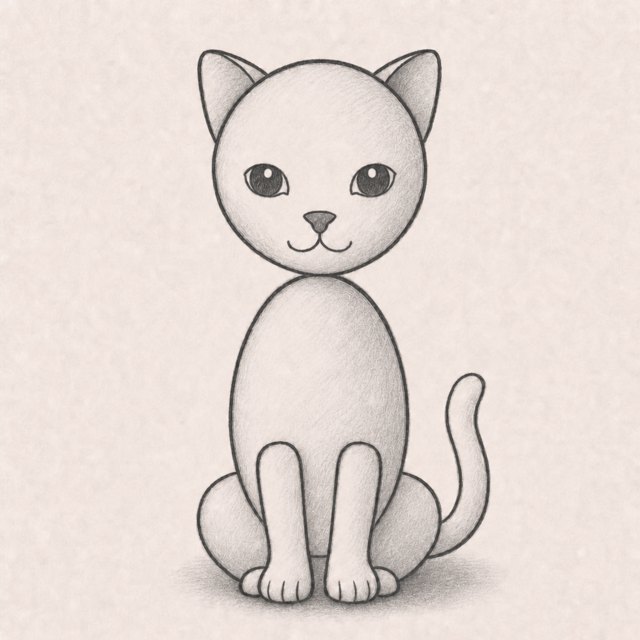
the finished cat ✎
Draw along with the video
grab a pencil and press play — every step is narrated ✎
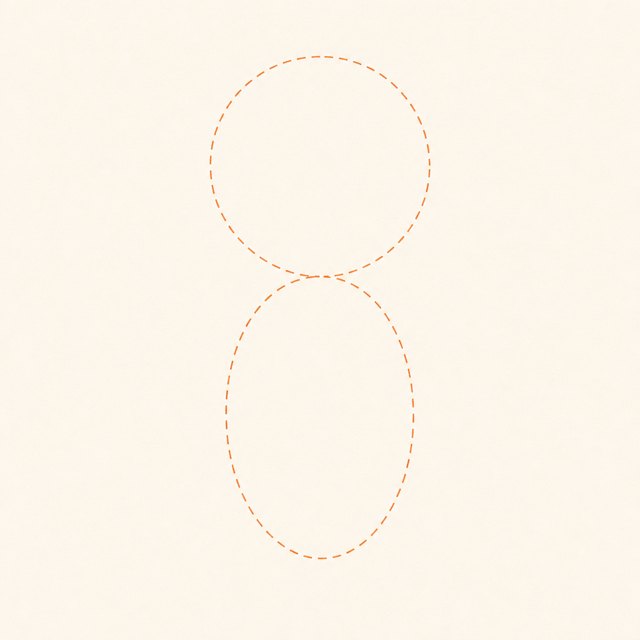
Draw Big Shapes
Sketch a light circle for the head and an oval for the body.
Begin by drawing a circle for the cat's head and an oval for its body. These shapes should be light and easy to erase, as they're just the foundation. This step helps us block in the overall size and posture of the cat.
check: the circle and oval are proportionate to each other ✎
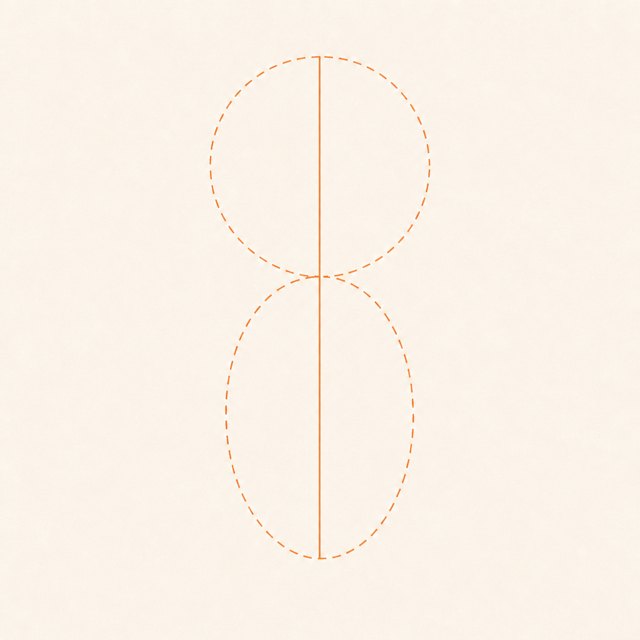
Add Center Lines
Draw a vertical line through the head and body to find the center.
Now, lightly draw a vertical line through the center of the head and body. This will help us keep our features symmetrical and aligned. These center lines act as guides for placing the cat's features accurately.
check: Ensure the center line divides each shape evenly ✎
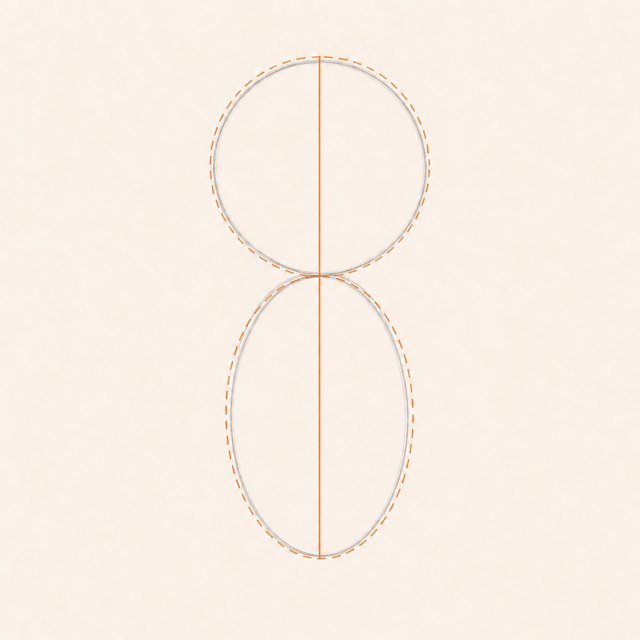
Outline Contours
Refine the head and body shapes with a more accurate outline.
Using the circle and oval as guides, refine the outline of the cat's head and body. Make the lines more accurate but still light. This step is about getting the silhouette right before we add any details.
check: the refined outline looks smooth and follows the basic shapes closely ✎
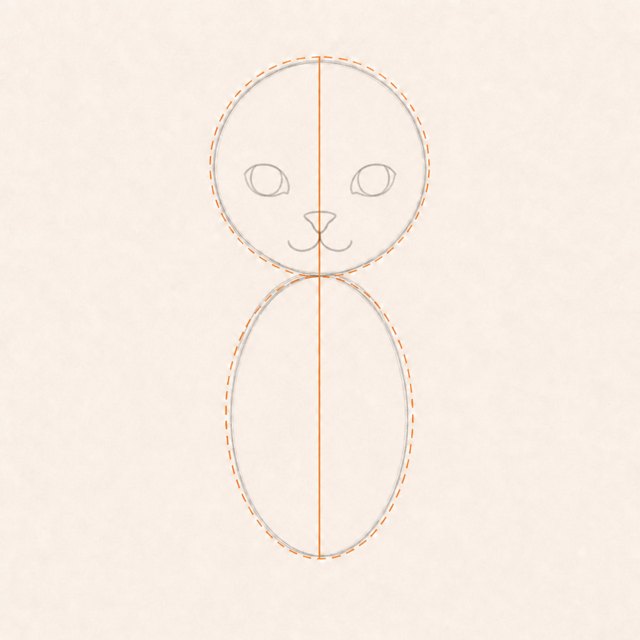
Place Features
Lightly sketch the eyes, nose, and mouth using the center lines as guides.
Now, place the cat's eyes on the head circle, using the center line to keep them even. Add a small triangle for the nose and a line for the mouth. These features start bringing the cat's face to life and should be placed lightly for adjustments.
check: Ensure the facial features are symmetrical and aligned with the center line ✎
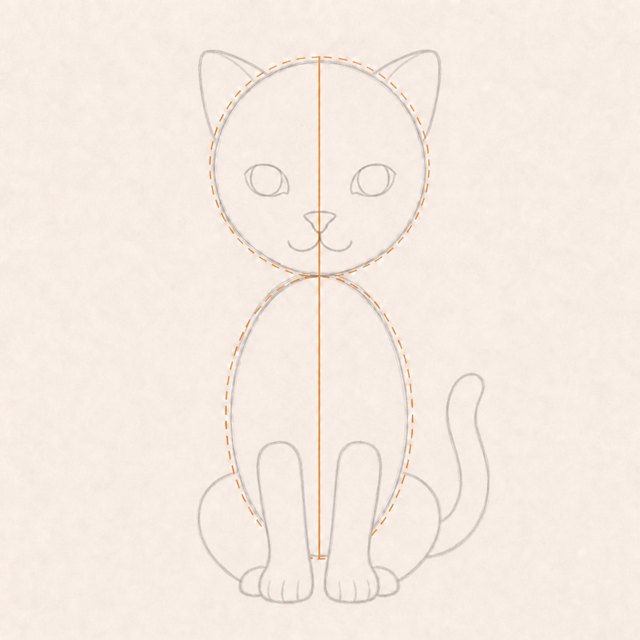
Add Details
Sketch the ears, paws, and tail with simple lines and shapes.
Add triangular shapes for the ears on top of the head and simple lines for the paws and tail. These elements give the cat its character and should be drawn lightly to maintain flexibility. This step enhances the overall structure of your cat drawing.
check: the ears, paws, and tail are proportionate to the body ✎
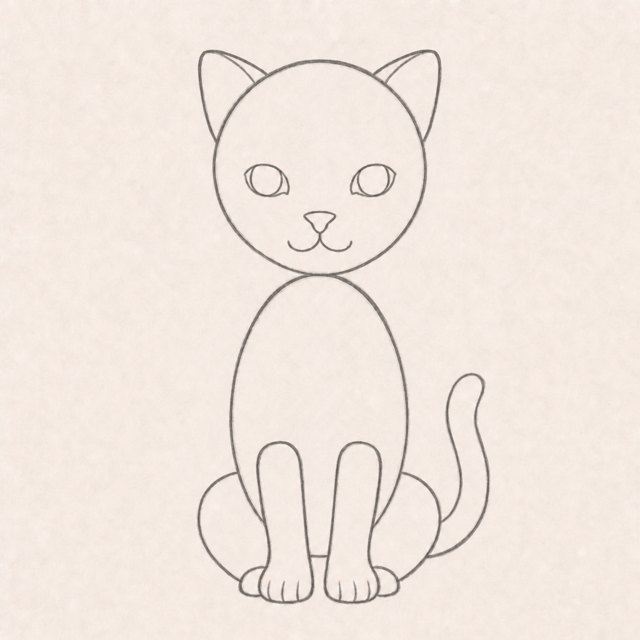
Define Line Weight
Press harder to darken the final lines, adding depth and emphasis.
Now, go over your drawing with a firmer hand to emphasize the final lines. Darken the contours and features that you want to stand out. This final step gives your drawing a polished look, highlighting the cat's form and features.
check: Ensure your final lines are confident and enhance the overall drawing ✎
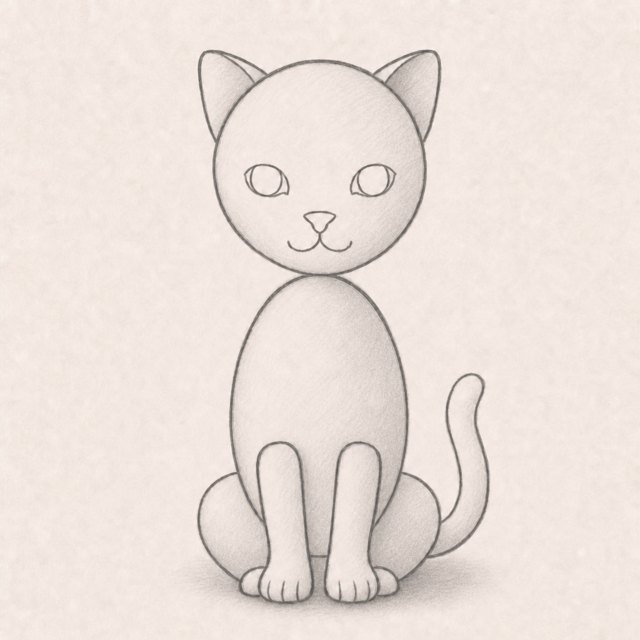
Add Tone and Shade
Pick where the light comes from, then shade the opposite side with light strokes.
Time to learn tone. Artists call the grays between white and black values, and even three are enough: light, medium and dark. Decide where your light comes from, and imagine it shining from the top left. Now shade the opposite side with the side of your pencil, in soft even layers. Shading is what makes your drawing feel round instead of flat.
check: the shading sits on the side away from the light ✎
Finishing Touches
Darken the boldest edges, fill the darkest details, and add a few texture strokes.
The last minute is where the magic happens. Press harder on the outer contour so it stands out, and keep the inside lines thin and soft. Fill your darkest little details completely, add a few short strokes for texture, and give the drawing a soft shadow to sit on. Mixing thin, soft and hard lines is what gives a drawing its character.
check: your outer lines look bolder than your inner ones ✎
Want to draw YOUR cat?
Upload a photo and your teacher builds this exact kind of lesson from it. You draw it yourself, on paper, guided stroke by stroke.
Turn a photo into your lessonfirst lesson free · no card, no subscription